The Dashboard is where you land when you first log in. This is a section that your audience cannot see and is only accessible via username and password.
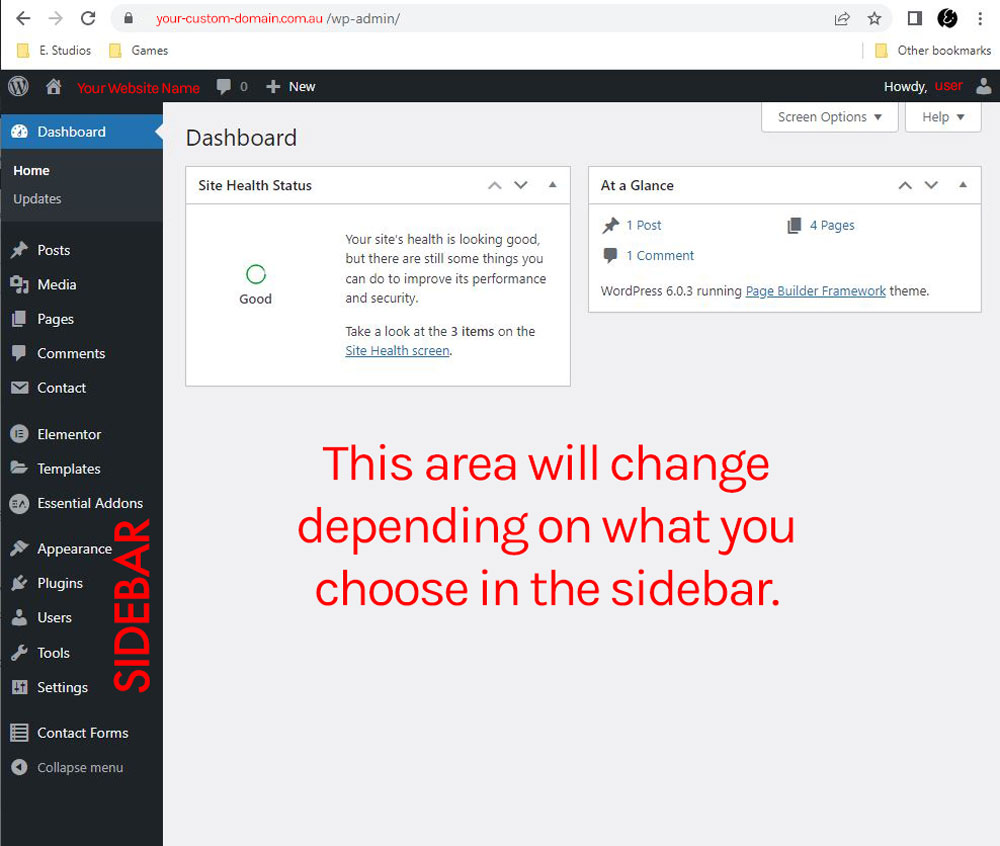
You will have a sidebar on the left side for the different sections of the website. This side bar may look different to other users if they have a different level of access.
This is where all your images are uploaded. The media tab has a drag/drop function so feel free to just drag images in. By default, the maximum upload is 2MB and there are certain types of images that are not allowed to be uploaded. During installation, your developer may change these settings to allow you to upload any type of image or file size and this can only be done in wp-config.php.
Image Size and Resolution
When uploading files, please make sure to use a web-friendly version and not the high resolution photo. This helps load your website faster; which in turn, helps with your SEO.
Alternative Text
Make sure to ALWAYS leave an alternative text which relates to the keywords that you want to show up in Google. This may seem like a tedious thing to do, but it helps with your SEO.
Pages are exactly what they are; the pages of your website. You can hover your mouse over a page name and see some actions that you can take.
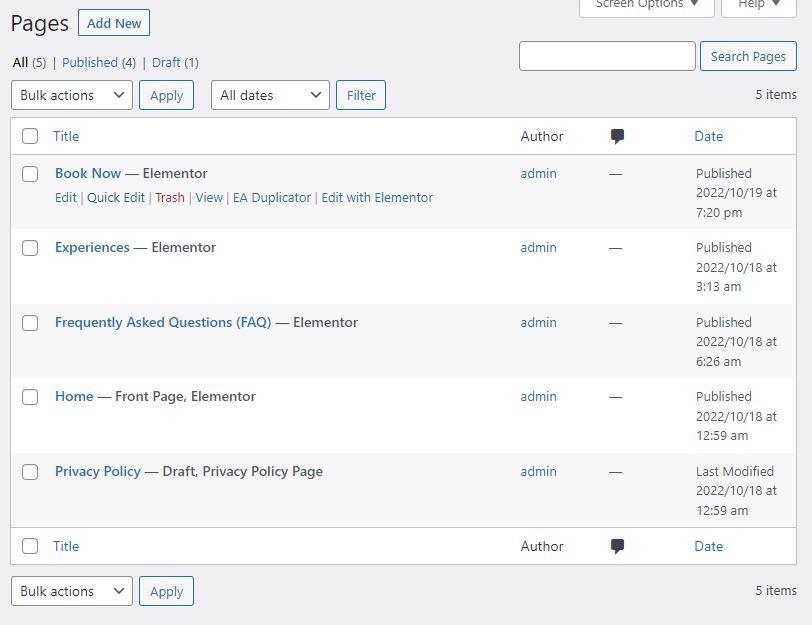
You might have a visual editor (like Elementor or Page Builder installed that allows you to drag and drop the different elements of your website. If so, make sure you edit with your appropriate editor when editing the visual look of your page. This means if you see a button that says “Edit with Elementor” instead of just “Edit” then choose this option.
If you are editing anything else, like the permalink, SEO, page name, you can simply click “Edit”. “Quick Edit” can also access some of these without having to leave the page dashboard.
Posts are used when you create a blog. If your website currently does not have a blog, this will have one post called “Hello World!” or your developer might have deleted it to keep it blank. However, this is a standard section in WordPress and therefore gives you the option to implement one in the future. A post will usually have a template style where it has a sidebar on the right side unless you change their template.
Posts are edited pretty much in the same manner as pages but they are tied to the Archive Page of your blog which has a customisable URL.
Comments is a section for all the comments viewers leave on each page or post. By default, it is turned on but I personally turn this off as it can lead to a lot of spam. If you decide to leave this on, first check your “Settings” and also implement an anti-spam system.
The appearance tab is where you may style your website. It has 5 areas: Themes, Customise, Widgets, Menus and Theme Editor.
Appearance > Themes
WordPress works with “Themes” which you can choose from the large WordPress library. Your developer should choose a lightweight theme. I personally use a light-weight theme like Page Builder Framework or OnePress. These themes are easily customisable and are completely free to use.
The developers regularly update the themes to be compatible with the newer releases of WordPress. Make sure to update the theme AFTER a backup of your website. You can change the theme if you like but be wary that your developer might have used some custom CSS to style your website and changing themes might break those styles.
Appearance > Customise
This will take you to the front of the website as it customises the style of the website. Some of the styling in here might be overridden by the visual editors like Elementor Site Settings so be wary of this! You can also access the customise section via the top bar when logged in.
![]()
Appearance > Widgets
This is where you can change the elements in your Sidebar. The sidebar only shows up on posts by default or to any pages/posts you decide to use a page template that involves a sidebar.
Appearance > Menus
This is where you can edit the structure of your menu. Choose the menu you wish to edit at the top then the rest of this area is pretty self-explanatory as it is drag and drop. When the item is indented, it is considered a sub-menu of the item above it. Choose a page, post, category or even your own custom link to place into your menu.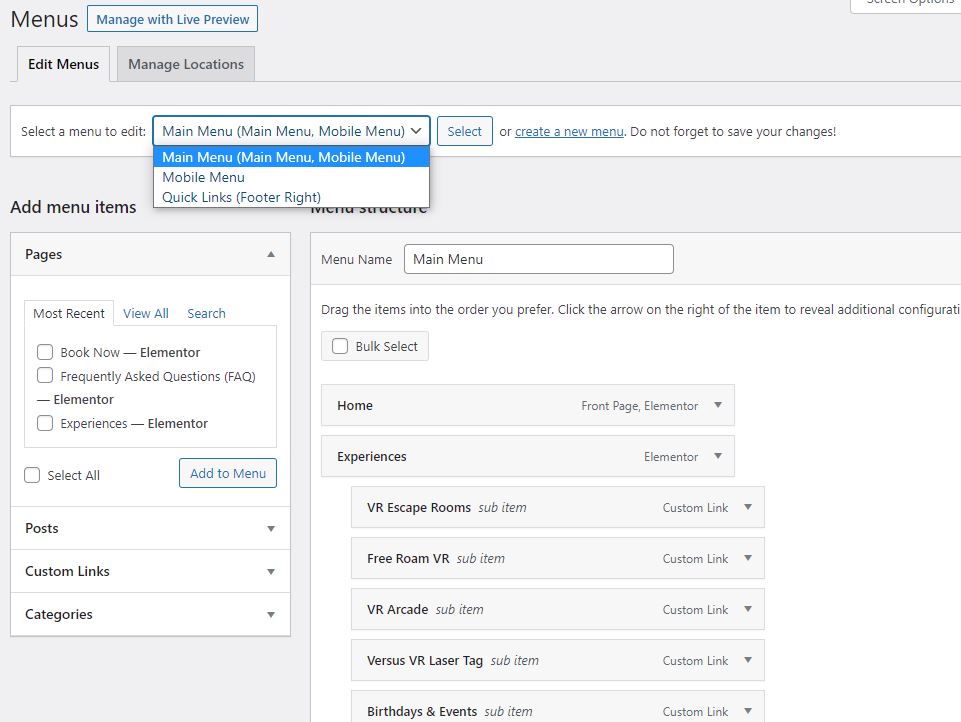
Appearance > Theme File Editor
NEVER touch the Theme File Editor unless you are a developer and know what you are doing.
Plugins are additional features you might want on your website. This can be anything from a simple contact form to a complex user management system. WordPress has a wide variety of developed plugins for free but also have paid plugins. Make sure to research a plugin first before installing or purchasing.
This area allows you to manage the users to the website and also change their level of access. This is especially useful if you have content creators that you do not want messing with the website code. This is also useful if you have a subscription system and want to allow some exclusive content for members only.
The tools area allows you to import or export things from your website (usually for backup). However, this is not a complete backup as it only backs your website structure and not the CMS itself. Some plugins might appear here when installed if it is to do with similar functionality.
This is your general site settings like the name of the website, etc. Some plugins might appear here when installed if it is to do with similar functionality. There are a few sections in here:
General
This is the name and tagline of your website. This is crucial for your SEO and should be set to something related to your keywords. This area also sets the admin for your website and determines: date and time format, and whether you allow people to register.
Writing
This section is useful when writing your blog as you can send an email to your website for publishing without having to log in to the website.
Reading
This determines your homepage (also shows up in “Customise” in the front editor) and your blog’s default archive page. You can also determine the preview to show an excerpt or a full post. NEVER tick the “Discourage search engines from indexing this website” as this sends out a ping that tells Google and other search engines not to list your website on searches; unless of course you want a private site.
Discussion
Are the settings for allowing comments on your pages or posts.
Media
When uploading media, WordPress automatically generates the sizes shown in this section. You can also change how the images are organised in the hosting.
Permalinks
The setting for how your pages and posts are named. Set this to “post name” as this is the best structure for SEO.
Policy
A Privacy Policy is required by law so this is set to an automatically generated Privacy Policy page. Please edit this page and check that it is in line with your own policy.
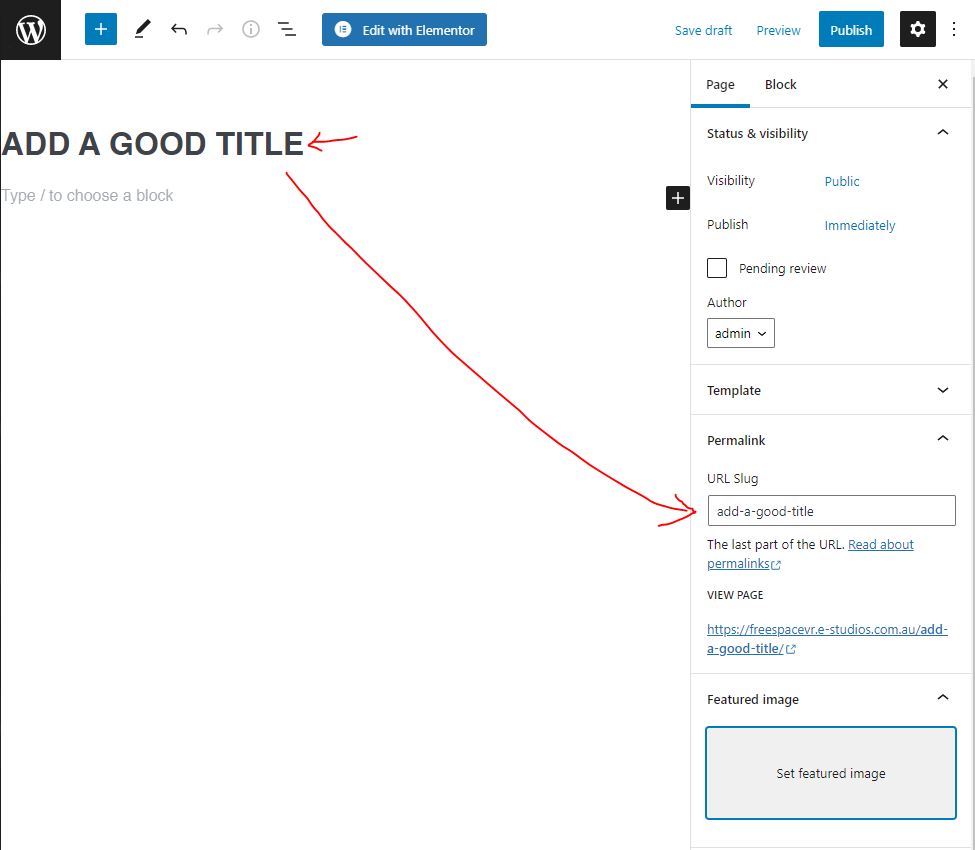
Simply go to Pages and Press “Add New”. Make sure to give it a name and to check that your permalink is also the same words (the words in your link also affect your SEO).
Save your page as a draft once you have the permalink and IF you have a visual editor then always use their alternative button instead. For example: “Edit with Elementor” instead of “Edit”.
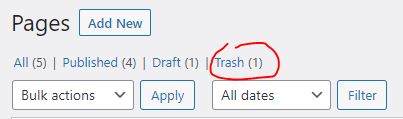
Oops! I accidentally deleted a page! Don’t worry, WordPress does not immediately delete a page so when you accidentally press “Trash” or move the page to trash, there will be an extra tab that will keep your trashed pages. Here you can restore the page you accidentally deleted. Most sections will have the same function so you can restore deleted items.